
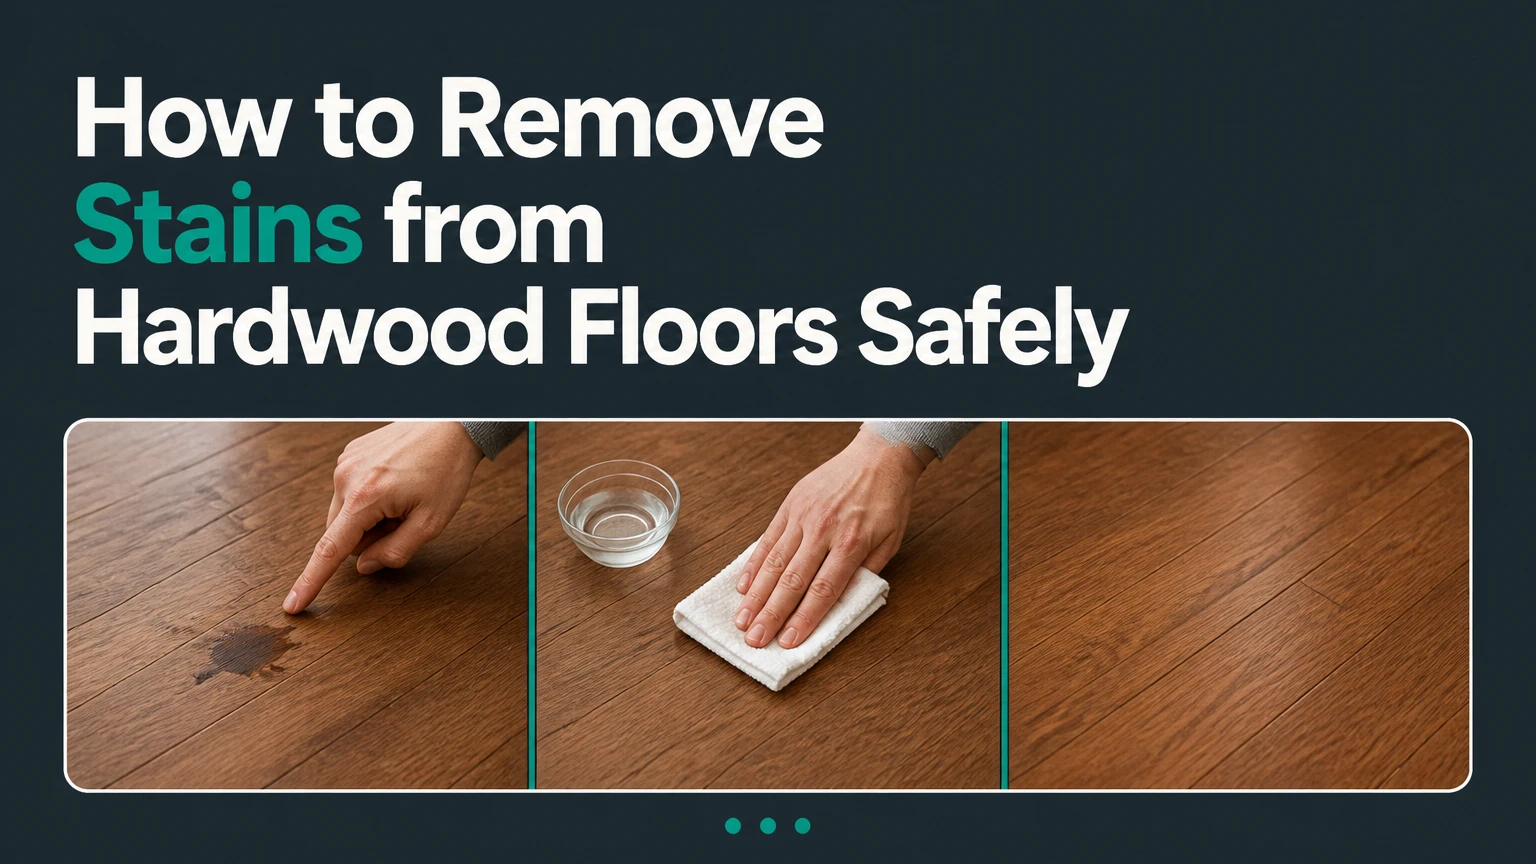
To remove stains from hardwood floors, first identify the finish and stain type, then clean with the least aggressive compatible method. Blot fresh spills, use minimal moisture on sealed floors, and test every solvent or bleaching agent in a hidden area. White rings often remain in the finish, while black stains usually penetrate the wood and may require bleaching or sanding.
Key Facts
A water bead usually indicates a surface finish, while rapid absorption suggests oil, wax, or unfinished wood.
White rings are commonly finish-level moisture marks; black marks usually indicate deeper water, tannin, rust, or urine damage.
Never flood hardwood flooring, use a steam mop, or mix bleach with ammonia or acidic cleaners.
Three-percent hydrogen peroxide is the usual retail concentration for cautious spot testing, but it can lighten wood and finish.
Oxalic acid belongs on stripped, bare wood, not on an intact polyurethane coating.
A stain that has caused cupping, soft wood, persistent odor, or finish failure needs professional assessment.
Before You Start: Check the Finish and the Stain
The finish determines which stain-removal products are safe. A sealed polyurethane floor can tolerate a carefully dampened cloth, but alcohol, strong solvents, acids, and abrasives can dull or dissolve the coating; unfinished, oil-finished, waxed, and engineered floors require different limits.
Identify the floor surface
Use a clean, dry area near a wall or inside a closet. Place one small drop of water on the surface for 10-15 seconds, then wipe it immediately.
| Observation | Likely surface | Initial treatment limit | Main risk |
|---|---|---|---|
| Water beads and leaves no dark spot | Polyurethane, aluminum oxide, or factory coating | Damp microfiber cloth and pH-neutral cleaner | Dulling from solvent or wax buildup |
| Water darkens the wood quickly | Oil finish, wax, or unfinished wood | Dry methods and finish-approved products | Deep absorption and raised grain |
| Boards have a soft sheen and show fingerprints | Wax or penetrating oil | Manufacturer-approved cleaner only | Uneven sheen from spot cleaning |
| Thin top layer, repeating grain, click-lock edges | Engineered hardwood | Short, low-moisture treatment | Sanding through the veneer |
| Printed grain or plastic wear layer | Laminate, not hardwood | Laminate cleaner, no wood bleach | Permanent surface damage |
The water test is a screening method, not a laboratory identification. A worn polyurethane coating can absorb water at a damaged seam, and an oil-finished floor may still repel a small drop after recent maintenance.
Classify the stain by color, location, and age
Color alone does not identify the chemistry. A black mark beside a pet bowl suggests urine or water damage, while a black mark under a metal plant stand may involve iron and tannins.
| Stain appearance | Common cause | Likely depth | First choice |
|---|---|---|---|
| White, cloudy, or gray ring | Moisture or heat in finish | Surface or finish-level | Dry cloth, finish-safe polishing, cautious heat |
| Black or blue-black patch | Water, urine, iron, tannins | Wood fibers | Peroxide test, then professional or bare-wood treatment |
| Dark greasy halo | Oil, butter, food, cosmetics | Finish or pores | Absorbent material, controlled detergent foam |
| Red, brown, or purple pigment | Wine, blood, dye, fruit | Surface to shallow wood | Blotting, then targeted alcohol or peroxide test |
| Sticky clear or amber residue | Tape, adhesive, wax, sap | Surface | Plastic scraper and compatible solvent |
| Green or gray film | Mold, algae, or copper reaction | Surface or moisture-damaged wood | Stop moisture source and seek assessment |
How to Remove Stains from Hardwood Floors Safely
A safe stain-removal process has six stages: remove dry soil, identify the finish, test a small area, apply the weakest suitable treatment, remove residue, and restore the surface. Most small sealed-floor stains take 5-20 minutes of active work, but drying and color correction can extend the project to 24 hours.
Gather the right materials
Prepare only the products needed for the suspected stain. Do not assemble a mixture of household cleaners, because incompatible products can create toxic vapors or damage the finish before you identify the cause.
Before-you-start box
- Typical active time: 5-30 minutes for a surface stain
- Typical total time: 30 minutes to 24 hours
- Difficulty: Low for sealed floors, moderate to high for bare wood
- Cost: Approximately $5-$20 for basic supplies; $20-$60 for specialty products
- Tools: Microfiber cloths, vacuum with a soft-floor setting, plastic scraper, cotton swabs, nitrile gloves, eye protection, and a small fan
- Possible treatments: pH-neutral hardwood cleaner, 3% hydrogen peroxide, 70-91% isopropyl alcohol, mineral spirits, or oxalic acid for bare wood only
- Prerequisites: The spill source must be stopped, ventilation must be available, and a hidden test area must be accessible
Step 1: Remove dry dirt and loose material
Vacuum with a soft-floor attachment, or lift grit with a dry microfiber cloth. Pick up solids with a plastic card rather than dragging them across the finish.
Abrasive grit can create scratches that resemble staining. Do not wet-clean first if sand, pet litter, or dried food remains on the floor.
You’ll know it worked when: the discoloration remains but the surrounding surface feels smooth and grit-free.
Common mistake: rubbing dry soil into the coating, which converts removable debris into fine scratches.
Step 2: Blot fresh liquid immediately
Press folded paper towels or a dry microfiber cloth onto the spill. Replace saturated material instead of wiping outward, particularly when the liquid contains wine, ink, hair dye, or blood.
Keep water exposure brief. The USDA Forest Products Laboratory’s Wood Handbook, FPL-GTR-282, describes wood as “hygroscopic,” meaning wood exchanges moisture with surrounding conditions; prolonged wetting can therefore cause swelling and dimensional movement.
You’ll know it worked when: the cloth absorbs liquid and the stain stops spreading.
Common mistake: using a bucket and mop on a small spill. Local blotting uses far less water.
Step 3: Clean a sealed surface with minimal moisture
Spray a pH-neutral hardwood cleaner onto a cloth, not directly onto the floor. Wipe a small area, then dry it with a second cloth within one minute.
For grease, use the foam from a drop of dish detergent mixed into approximately 250 milliliters of warm water. Apply foam only, leave it for 2-3 minutes, wipe with a barely damp cloth, and dry immediately.
You’ll know it worked when: the surface is clean, dry, and no sticky film remains.
Common mistake: using vinegar, ammonia, oil soap, or a steam mop without confirming compatibility. Acids and alkaline cleaners can change sheen, and steam can drive moisture into joints.
Step 4: Test the targeted treatment
Apply one drop or a 1-centimeter spot of the chosen product inside a closet or beneath furniture. Wait the full recommended dwell time, then inspect under the same lighting.
Test for three changes: color shift, gloss loss, and tackiness. A product that removes the stain but leaves a dull halo has not produced a successful repair.
You’ll know it worked when: the test area dries with the original color and sheen intact.
Common mistake: testing only whether the stain disappears. Finish damage often becomes visible after evaporation.
Step 5: Treat the stain according to its type
Use the stain-specific methods below. Apply small amounts, work from the outer edge toward the center, and stop when the stain no longer improves after one or two controlled attempts.
You’ll know it worked when: the discoloration is lighter without a larger wet, dull, or bleached ring.
Common mistake: increasing pressure when chemistry, not force, is required.
Step 6: Remove residue and allow complete drying
Wipe treated areas with a cloth barely dampened with clean water only when the product label allows rinsing. Dry immediately and ventilate the room.
Do not apply wax, polish, or polyurethane over a damp or chemically active surface. A small finish repair may need 12-24 hours before normal traffic, depending on the coating label, temperature, and humidity.
You’ll know it worked when: the floor feels dry and the repaired sheen matches the surrounding boards.
Common mistake: applying furniture polish to hide a white haze. Polish can trap residue and create a larger uneven patch.
What Should You Use for Each Stain Type?
White, black, greasy, and pigmented stains require different treatments because each discoloration occupies a different layer. The safest sequence moves from dry lifting and mild cleaning to controlled solvent use, oxidation, or sanding only when the finish has already been removed.
White water and heat rings
White rings usually indicate moisture trapped in or beneath a clear finish rather than permanently discolored wood. Start with a dry microfiber cloth, then try a manufacturer-approved floor polish on a hidden test area; low heat is a last-resort method because excessive heat can soften polyurethane or scorch wood.
If using an iron method, place a thick, dry cotton cloth over the mark, set the iron to its lowest dry setting, and touch the cloth for 5-10 seconds at a time. Lift the cloth between passes and inspect continuously. Never use steam, leave the iron stationary, or use this method on wax, antique, unknown, or visibly damaged finishes.
Mineral oil may reduce a white mark on some waxed surfaces, but it can darken porous wood and interfere with later recoating. Denatured alcohol is not a universal remedy and can dissolve shellac or damage certain coatings, so professional guidance is safer for valuable or unknown floors.
Black water, urine, rust, and tannin stains
Black stains generally extend into the wood fibers, so ordinary floor cleaner cannot remove them. Water, urine, and iron can react with tannins in oak and other species, producing a dark iron-tannin complex.
For a small, recent mark on compatible bare wood, test 3% hydrogen peroxide with a cotton swab or white cloth. Keep the application localized, inspect after 10-15 minutes, and remove it when the tone improves. A prolonged wet compress can lighten the surrounding wood and raise the grain.
Oxalic acid wood bleach is a specialist treatment for stripped, bare wood. Follow the product label, wear chemical-resistant gloves and eye protection, ventilate the area, and neutralize or rinse only as directed. Oxalic acid should not be placed on intact polyurethane, and it will not correct boards that are swollen, soft, or structurally degraded.
Urine requires odor control as well as color reduction. If liquid reached seams, underlayment, or subfloor, surface bleaching may leave the odor source untouched; board removal or professional extraction may be necessary.
Grease, oil, butter, and milk
Greasy stains respond best to absorption and degreasing, not acidic household cleaners. Lift excess material with a plastic scraper, cover the area with an absorbent powder such as baking soda for 15-30 minutes, then vacuum gently.
On a sealed, compatible finish, use detergent foam rather than free water. Mineral spirits can dissolve oily residue, but the solvent may soften some coatings and is flammable; test first, use ventilation, avoid ignition sources, and never pour it onto the floor.
A hydrogen-peroxide-and-baking-soda paste is not automatically safer. Peroxide can bleach the wood, baking soda can abrade a glossy coating, and the paste introduces moisture. Use that approach only on tested bare wood or where the flooring manufacturer permits it.
Ink, hair dye, wine, blood, and paint
Blot liquid pigments immediately and keep the cloth moving toward a clean section. Do not scrub side to side, since pigment can spread along the grain and into open joints.
For a sealed floor, test 70% or 91% isopropyl alcohol with a cotton swab. Touch the mark briefly, lift the pigment, and stop if the finish becomes tacky or dull. Alcohol can damage shellac, wax, some waterborne coatings, and colored finishes.
Blood should be treated with cold water on a cloth, not hot water, because heat can set proteins. Dried paint should be lifted mechanically with a plastic scraper before testing a compatible solvent. Chlorine bleach can destroy wood color, weaken fibers, and leave an uneven pale spot, so it is a poor first choice for finished hardwood and should never be mixed with ammonia, vinegar, or other cleaners.
Which Stain-Removal Method Is Best?
The best method is the least aggressive option that reaches the stain without damaging the finish. Dry blotting and neutral cleaner are appropriate for fresh surface contamination, while oxidation, solvent treatment, or sanding becomes reasonable only after testing confirms that milder methods cannot work.
| Method | Active time | Suitable surface | Main benefit | Main limitation |
|---|---|---|---|---|
| Dry microfiber and blotting | 1-5 minutes | All surfaces | Removes fresh liquid and soil | Does not remove cured discoloration |
| pH-neutral hardwood cleaner | 5-10 minutes | Sealed polyurethane | Low-residue surface cleaning | Cannot remove deep black stains |
| Isopropyl alcohol test | 1-5 minutes | Compatible sealed finish | Lifts some ink and dye | Can dissolve or dull coatings |
| 3% hydrogen peroxide | 10-120 minutes | Tested finish or bare wood | Oxidizes organic discoloration | Can bleach surrounding wood |
| Oxalic acid | 2-24 hours | Stripped bare wood | Treats iron-tannin blackening | Hazardous and unsuitable for intact finish |
| Spot sanding and recoating | 1-2 days | Solid hardwood, adequate thickness | Removes damaged surface wood | Leaves blend and veneer-through risks |
Mechanical abrasion is not a cleaning method. Sanding removes finish and a measurable amount of wood, so it should follow chemical and finish assessment rather than replace it.
What Changes for Engineered, Waxed, or Unfinished Floors?
Engineered hardwood, waxed floors, and unfinished boards cannot share one stain-removal recipe. Engineered flooring has a limited wear layer, waxed floors can develop halos from solvents, and unfinished wood absorbs liquids rapidly.
Engineered hardwood
Confirm the wear-layer thickness if documentation is available. Avoid aggressive spot sanding unless a flooring professional confirms that the top veneer can tolerate it; a 0.6-millimeter veneer has far less repair capacity than a 4-millimeter wear layer.
Use minimal moisture and manufacturer-approved cleaner. Black staining that reaches the veneer may be visually improved but not fully erased without replacing the affected plank.
Waxed or oil-finished floors
Use the original maintenance product whenever possible. Solvents can remove wax unevenly, while water can create pale or dark patches in oil-finished wood.
After stain removal, the correct repair may be a localized re-oiling or rewaxing rather than polyurethane. A mismatched finish creates a visible sheen boundary even when the color is correct.
Unfinished or stripped wood
Bare wood permits peroxide, oxalic acid, and controlled sanding, but it also absorbs every liquid quickly. Mask nearby boards, use small applications, allow full drying, and expect color matching after the stain is removed.
Common Mistakes and How to Fix Them
Most failed hardwood stain repairs result from excess water, incompatible chemistry, or treating the finish instead of the stain. The recovery depends on the damage: residue can be rinsed carefully, while dissolved finish or color loss usually requires sanding and recoating.
| Mistake | What it causes | Immediate recovery | Escalation point |
|---|---|---|---|
| Flooding with water | Swelling, cupping, dark seams | Extract, dry with airflow, stop water source | Boards remain raised after 48 hours |
| Steam cleaning | Finish whitening, open joints, swelling | Stop heat and dry the area | Finish blisters or boards warp |
| Steel wool or wire brush | Scratches and iron particles | Vacuum loose fibers, avoid more abrasion | Black specks or visible scratch halo |
| Bleach mixed with ammonia | Toxic chloramine gas | Leave area and ventilate safely | Call emergency services for symptoms |
| Strong solvent on coating | Dull, tacky, or melted finish | Stop rubbing and allow ventilation | Finish remains soft or uneven |
| Repeated spot bleaching | Pale halo and color mismatch | Stop at first improvement, document product | Color correction or board replacement |
A white chalky haze often indicates residue or finish whitening, not a stain that needs more product. A trained floor refinisher can determine whether the haze is removable contamination or permanent coating damage.
Raised grain on bare wood can sometimes be smoothed after complete drying with 220-grit paper, parallel to the grain, followed by compatible finish. Do not sand swollen boards while they are still wet.
How Much Time and Money Will It Take?
A small surface stain typically costs $5-$20 and takes 5-30 minutes of active work. Deep black staining, odor contamination, finish repair, and color matching commonly increase the total project to $100-$500 or more, depending on access and the number of boards.
| Repair level | Typical materials or labor | Active time | Total elapsed time |
|---|---|---|---|
| Fresh spill on sealed floor | $0-$10 | 5-10 minutes | Under 30 minutes |
| White ring treatment | $5-$20 | 10-20 minutes | 30 minutes |
| Pigment or grease treatment | $5-$30 | 15-45 minutes | 1-4 hours |
| Bare-wood bleaching | $15-$50 | 30-90 minutes | 12-24 hours |
| Spot sanding and recoating | $30-$150 DIY | 2-4 hours | 1-2 days |
| Professional board or area repair | $150-$600 typical | 2-6 hours | 1-3 days |
These are typical U.S. retail and service ranges, not fixed quotes. Regional labor, floor species, finish type, furniture removal, moisture damage, and color-matching requirements can change the price substantially.
When Should You Call a Professional?
Call a hardwood-floor professional when the stain covers several boards, the wood is soft or cupped, urine odor persists, the finish is unknown, or sanding could expose an engineered-floor veneer. Professional assessment is also appropriate for antique floors, penetrating black stains, lead-paint debris, and damage near electrical or plumbing leaks.
A practical rule is to stop after one or two carefully tested treatments. If the color does not improve, the stain may be below the finish, chemically fixed, or associated with damaged wood. Additional applications increase the repair halo without improving the underlying problem.
Ask the contractor whether the proposed work includes moisture measurement, finish identification, spot blending, and a written description of the replacement or refinishing area. A quote that only promises stain removal may omit the visible color and sheen correction needed afterward.
How Can You Prevent New Hardwood Floor Stains?
Prevention reduces both staining and finish wear. Place absorbent mats at exterior doors, use felt pads under furniture, keep plant containers elevated in waterproof trays, and wipe pet accidents before liquid reaches board seams.
Avoid rubber-backed mats unless the flooring manufacturer approves them, because some backings trap moisture or discolor the finish. Keep indoor humidity reasonably stable; the National Wood Flooring Association recommends following the flooring manufacturer’s environmental guidance, since seasonal moisture changes can open joints or stress boards.
Clean with a dry microfiber mop for routine soil and a barely damp cloth for localized spills. Do not use polish or wax as a substitute for cleaning, because accumulated products can complicate future recoating.
Frequently Asked Questions
Can vinegar remove stains from hardwood floors?
Vinegar is not a reliable stain remover for hardwood flooring and can dull or alter some finishes with repeated use. Vinegar also does not remove deep black water or urine discoloration. Use a pH-neutral hardwood cleaner approved for the specific finish, then reserve chemical treatments for a tested, stain-specific application.
How do you remove black dog urine stains from wood floors?
Black dog urine stains usually require finish removal before treatment because the discoloration has entered the wood. After identifying the affected area, a professional may use 3% hydrogen peroxide or oxalic acid on bare wood, then dry, color-match, and refinish it. Persistent odor can require replacing contaminated boards or subfloor material.
Can baking soda damage a hardwood floor?
Baking soda can scratch a glossy finish when rubbed, and a wet baking-soda paste can leave moisture in joints. Use it as a dry absorbent for greasy residue, apply it briefly, and vacuum without scrubbing. Do not use it as a routine abrasive cleaner.
Is hydrogen peroxide safe on finished hardwood?
Three-percent hydrogen peroxide is only conditionally safe on finished hardwood because it can lighten color, alter sheen, or leave a pale ring. Test a hidden spot, use the smallest practical amount, monitor the dwell time, and remove the product promptly when improvement stops.
Can you sand one stain out of a hardwood floor?
You can spot-sand some stains from solid hardwood, but the repair must be feathered into surrounding finish and matched with the correct stain and sheen. Engineered hardwood may have too little wear layer for sanding. Deep gouges, widespread discoloration, and boards with moisture damage often require board replacement or area refinishing.
How do you remove a stain without changing the floor color?
Use the least aggressive method compatible with the finish, keep the treatment within the affected area, and stop as soon as the mark improves. Solvents and bleaches can remove natural color as well as stain, so hidden testing and controlled dwell time are the best safeguards.
The Bottom Line
To remove stains from hardwood floors, match the treatment to the finish, stain chemistry, and depth. Blot fresh spills, use minimal moisture on sealed boards, test peroxide or alcohol before applying them broadly, and reserve oxalic acid or sanding for bare wood or professional repair. The safest successful treatment is always the mildest one that removes the discoloration without creating a larger finish or color problem.