
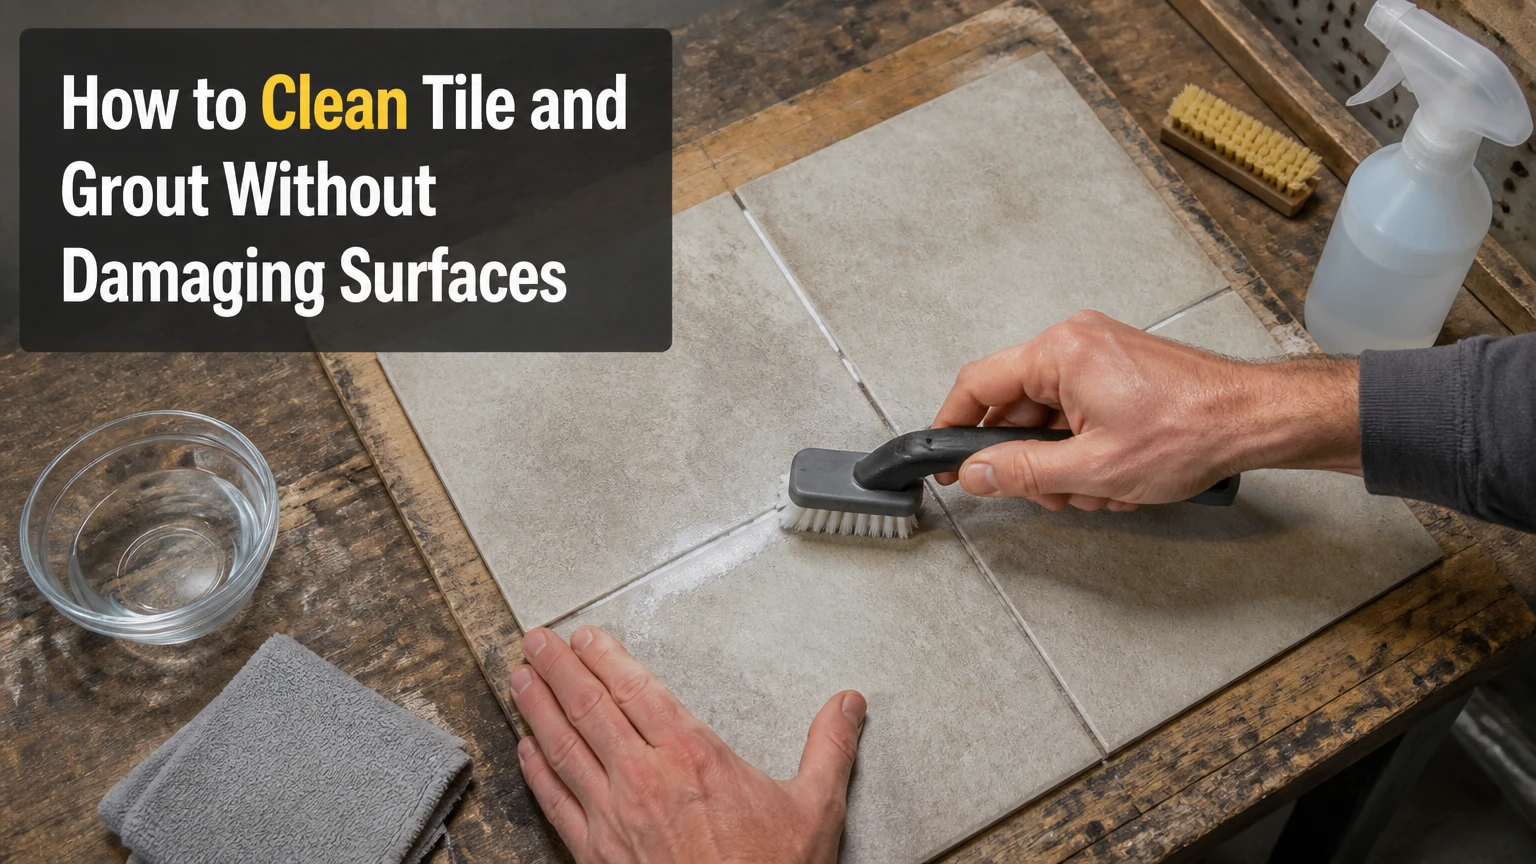
To clean tile and grout, remove dry grit, apply a surface-appropriate cleaner, allow 5-15 minutes of dwell time, scrub grout with nylon bristles, extract dirty water, rinse, and dry completely. Ceramic and porcelain tolerate stronger alkaline cleaners than marble, limestone, and travertine, which require pH-neutral products and gentler tools.
Key Facts at a Glance
Ceramic and porcelain tile are usually nonporous, but cement grout absorbs water, grease, and dissolved soil.
Dry vacuuming before wet cleaning prevents grit from becoming abrasive mud.
A nylon grout brush, not a wire brush, is the safest general-purpose agitation tool.
Alkaline cleaners suit kitchen grease; oxygen bleach suits many organic stains; acids suit mineral deposits only.
Never mix bleach, ammonia, acids, peroxide, or other household cleaners.
Grout must dry fully, typically 24-72 hours, before a penetrating sealer is tested and applied.
How to Clean Tile and Grout Safely
A typical 150-square-foot tiled floor takes 2-4 hours to deep-clean, including preparation, dwell time, scrubbing, rinsing, and drying setup. The most important success factor is not the strongest chemical; it is keeping the cleaner wet long enough to soften soil while removing the contaminated liquid before it dries back into grout.
Cement grout contains pores and capillaries that hold cooking oil, body oils, soap residue, dust, and colored stains. Tile glaze generally resists absorption, so the grout lines usually require more work than the tile faces. Epoxy grout behaves differently: it resists staining better, but abrasive powders and aggressive solvents can dull or damage its surface.
The cleaning chemistry should match the contaminant. Alkaline products break down fats and oily films, oxygen-based products oxidize many organic colorants, and acidic products dissolve mineral scale. No single cleaner safely removes every type of soil.
Before You Start
| Item | Typical requirement | Practical specification |
|---|---|---|
| Cleaning time | 2-4 hours | Based on 150 square feet and moderate soil |
| Drying time | 24-72 hours | Required before sealing, depending on humidity |
| DIY supply cost | $10-$45 | Brush, cleaner, gloves, towels, and spray bottle |
| Grout brush | 1 tool | Stiff nylon, 1-2 inch head |
| Rinse water | 2-4 gallons | Replace when visibly dirty |
| Protective equipment | 1 set | Nitrile or chemical-resistant gloves and eye protection |
First identify the tile and grout. Check an installation label, tile box, builder specification, or inconspicuous area. If the surface is marble, limestone, travertine, terrazzo, cement tile, slate, or another natural stone, begin with a pH-neutral stone cleaner rather than vinegar, lemon juice, sulfamic acid, or bathroom descaler.
Open windows and run the bathroom exhaust fan. Keep children and pets away from wet cleaning chemicals, and test every product on a hidden area for color change, gloss loss, or grout softening.
Step 1: Remove Furniture and Loose Soil
Clear rugs, baskets, furniture, and floor-level appliances from the area. Vacuum or sweep the tile and grout thoroughly, using a crevice tool along wall edges and under cabinets where hair and grit accumulate.
A vacuum is preferable to dry sweeping because it captures fine abrasive particles instead of redistributing them. Pay particular attention to textured porcelain, recessed grout joints, and shower corners, where loose soil can combine with cleaner and form a difficult slurry.
Success checkpoint: The floor has no visible hair, sand, crumbs, or loose powder before liquid cleaner is introduced.
Common mistake: Wet-mopping first. Water turns dry grit into an abrasive paste that spreads across the tile and can leave a film.
Step 2: Choose a Cleaner for the Soil
Choose the mildest product that matches the contaminant. Use a pH-neutral tile cleaner for routine maintenance, an alkaline cleaner for grease, oxygen bleach for many organic stains, and a carefully controlled acid product for mineral scale on acid-resistant ceramic or porcelain.
| Soil or problem | First-choice cleaner | Typical dwell time | Avoid or verify first |
|---|---|---|---|
| Dust and routine soil | pH-neutral tile cleaner | 3-5 minutes | Strong acids and abrasive powders |
| Cooking grease | Alkaline tile degreaser | 5-10 minutes | Natural stone unless label-approved |
| Coffee, tea, wine | Oxygen bleach solution | 10-15 minutes | Letting the solution dry |
| Soap scum | Mild alkaline bathroom cleaner | 5-10 minutes | Mixing with acidic descaler |
| Hard-water scale | Sulfamic or phosphoric acid | 1-5 minutes | Marble, limestone, travertine, cement tile |
| Black mildew staining | Oxygen bleach or labeled mildew product | 10-15 minutes | Treating porous caulk as permanent grout |
Read the product label for dilution, ventilation, contact time, and prohibited materials. Do not assume that a product labeled “tile cleaner” is safe for every tile. A cleaner can be safe for porcelain and harmful to polished limestone.
DIY Spot Cleaner
For a small stain on white or light-colored cement grout, mix two parts baking soda with one part 3% hydrogen peroxide into a spreadable paste. Apply it to the grout, wait 5-10 minutes, scrub with nylon, and rinse thoroughly.
This mixture is a spot treatment, not a universal floor cleaner. Hydrogen peroxide can lighten some colored grout, and baking soda can leave residue if the rinse is inadequate. Do not store the mixture in a sealed container, and never combine peroxide with chlorine bleach, vinegar, ammonia, or commercial cleaners.
Step 3: Apply Cleaner and Allow Dwell Time
Apply enough cleaner to wet the grout lines without flooding adjacent rooms, cabinets, floor vents, or unsealed edges. Work in manageable sections of about 10-20 square feet so the product remains wet during its contact period.
Allow 5-15 minutes of dwell time, following the label when it specifies a shorter or longer interval. Dwell time gives the chemical time to soften soil, but the cleaner must not dry on the surface. Add a small amount of product if the grout begins to dry.
For a powdered oxygen bleach, dissolve the label-directed amount completely in warm water. A common household concentration is about 2 tablespoons per quart, but product strength varies, so the package instructions take priority.
Success checkpoint: Soil begins to loosen, the grout remains visibly wet, and the liquid does not dry into a dull film.
Common mistake: Using excessive cleaner. More product often creates more residue, not faster cleaning, especially on textured porcelain.
Step 4: Scrub Grout with Nylon Agitation
Scrub grout lines with a stiff nylon grout brush, applying short back-and-forth strokes along the joint. Use moderate pressure first, then repeat after a second dwell period if the soil remains. A small electric brush can reduce effort, but its rotating head should not be forced into cracked or missing grout.
Use a soft microfiber pad or nonabrasive nylon pad on tile faces. Avoid steel wool and wire brushes. Metal bristles can scratch glazed ceramic, polish marks into some porcelain finishes, and remove sound grout from narrow joints.
Corners need a separate pass. Scrub shower niches, plumbing penetrations, thresholds, and the wall-to-floor junction because these areas collect moisture and residue while receiving less routine agitation.
Success checkpoint: The grout returns toward its original color and dirty foam or gray liquid appears during brushing.
Common mistake: Scrubbing dry grout. Dry abrasion can roughen the surface and removes less soil than wet chemical agitation.
Step 5: Extract Dirty Water and Rinse
Remove the contaminated solution immediately after scrubbing. Use a wet-dry vacuum, extraction machine, clean microfiber towels, or a mop followed by several clean-water passes.
Rinse with clean warm water in small sections. Change rinse water when it becomes cloudy or visibly dirty. Porous grout can reabsorb suspended soil if dirty water remains on the floor, so extraction is a separate cleaning stage rather than an optional finishing step.
On a wall tile installation, work from the top downward and place towels at the base. On floors, clean toward the room exit so footwear does not track residue back across the finished surface.
Success checkpoint: The rinse water stays clear, the tile has no sticky film, and grout joints do not look darker from pooled dirty water.
Common mistake: One-pass mopping. A single dirty mop usually redistributes dissolved grease instead of removing it.
Step 6: Dry, Inspect, and Decide Whether to Seal
Dry the surface with clean towels and improve air movement with fans or open windows. Keep the area dry until the grout has returned to its normal color. Typical drying takes 24-72 hours before sealing, although a dry climate may shorten that time and a shower installation may require longer.
Inspect grout after drying, not while it is wet. Dark patches can indicate remaining soil, uneven sealer, trapped moisture, or grout that has absorbed a stain beyond the cleaning stage. Do not seal over discoloration until the cause is understood.
To test a penetrating sealer, place several drops of water on clean, dry grout and wait 5-10 minutes. If the grout darkens quickly, absorption remains high. Follow the sealer label, apply only to dry grout, remove haze from tile faces promptly, and respect the stated cure time before water exposure.
Sealing protects cement grout from future absorption, but it does not make grout waterproof or eliminate routine cleaning. Epoxy grout generally does not require penetrating sealer.
Which Tile and Grout Cleaner Should You Use?
The best cleaner depends on both the tile material and the soil. A pH-neutral cleaner is the safest default, while alkaline products are more effective against grease and carefully used acid products are more effective against mineral deposits on ceramic or porcelain.
| Cleaner type | Best use | Typical contact time | Main limitation |
|---|---|---|---|
| pH-neutral cleaner | Routine soil and sealed surfaces | 3-5 minutes | Limited grease-cutting power |
| Alkaline degreaser | Cooking oil and body-oil film | 5-10 minutes | May damage or stain sensitive stone |
| Oxygen bleach | Organic stains and grout brightening | 10-15 minutes | Does not reliably remove mineral scale |
| Hydrogen peroxide paste | Small light-colored grout stains | 5-10 minutes | Can lighten colored grout |
| Sulfamic acid | Cement haze and mineral deposits | 1-5 minutes | Unsafe for many natural stones |
| Phosphoric acid | Rust and hard-water deposits | 1-5 minutes | Requires careful rinsing and label compliance |
When Should You Use an Alkaline Cleaner?
Use an alkaline cleaner for kitchen grease, tracked-in oily soil, and body-oil buildup on compatible ceramic or porcelain installations. Alkaline chemistry lifts fats more effectively than vinegar or oxygen bleach, but concentrated products can irritate skin and leave residue if they are not rinsed.
For heavy kitchen soil, divide the floor into small sections, use the label dilution, and follow with two clean-water rinses. A visibly yellow or brown grout line that remains unchanged after oxygen bleach usually needs degreasing rather than more bleaching.
Are Acidic Tile Cleaners Safe?
Acidic cleaners are appropriate only for mineral deposits on acid-resistant ceramic or porcelain, and they are unsafe for marble, limestone, travertine, many terrazzo surfaces, cement tile, and some glazed decorative materials. Acids dissolve mineral scale, but they can also etch stone and attack cement-based grout.
Use the shortest label contact time, scrub promptly, rinse repeatedly, and neutralize only when the product instructions require it. Baking soda is not a universal neutralizer for every acid product, so follow the manufacturer’s safety directions rather than improvising chemistry.
Tile Material Safety Guide
Tile material determines which cleaning errors are reversible. Glazed ceramic and porcelain usually tolerate more chemical choice, while calcium-based stone can develop permanent dull spots after one acid exposure.
| Surface | Safe starting method | Products to avoid | Special inspection |
|---|---|---|---|
| Glazed ceramic | pH-neutral or mild alkaline cleaner | Wire brush and unapproved acids | Check glaze for chips |
| Porcelain | pH-neutral, alkaline, or labeled acid cleaner | Abrasive powders on polished finish | Check for textured residue |
| Marble | pH-neutral stone cleaner | Vinegar, lemon, sulfamic acid | Look for etching and polish loss |
| Limestone or travertine | pH-neutral stone cleaner | Acid, bleach, abrasive scrubbers | Check filled holes and sealer |
| Slate | pH-neutral stone cleaner | Strong acids and waxy soaps | Check flaking and sealer |
| Cement tile | Manufacturer-approved neutral cleaner | Acid and aggressive degreaser | Check pigment bleeding |
| Epoxy grout | Neutral cleaner and soft nylon brush | Solvent, abrasive powder, wire brush | Check joint edges and haze |
What Changes for Showers and Kitchens?
Shower tile requires moisture and soap-scum control, while kitchen tile requires grease removal and residue extraction. The same six-step sequence works, but the cleaner, drying plan, and inspection points differ by room.
Bathroom and Shower Tile
Use a pH-neutral or mildly alkaline bathroom cleaner for soap scum on compatible tile. Oxygen bleach can help with organic discoloration, but black growth on silicone caulk may be permanent because caulk can be colonized below its surface.
Improve ventilation during and after showers. Clean exhaust fan grilles, repair leaks, and keep grout dry between uses. Persistent darkening, soft drywall, crumbling grout, or a musty odor indicates a moisture problem that surface cleaning cannot correct.
Kitchen Floor and Backsplash Tile
Use an alkaline degreaser for cooking oil and aerosolized grease, especially near the range and dishwasher. Let the cleaner dwell for 5-10 minutes, scrub grout, then rinse twice because alkaline residue can attract new soil.
Backsplashes often have grease concentrated above the cooktop. Protect painted walls, natural-stone countertops, and metal trim from overspray, and test the cleaner behind an appliance before applying it broadly.
Steam Cleaning Versus Chemical Cleaning
Steam cleaning can loosen soil and reduce chemical use, but steam is not automatically safer or more effective. High heat may soften old adhesive, force moisture into porous substrates, or worsen loose grout and cracked tile.
| Method | Typical equipment cost | Best setting | Main risk |
|---|---|---|---|
| Manual nylon brushing | $5-$20 | Small floors and spot work | High physical effort |
| Household steam cleaner | $80-$250 | Sound ceramic and porcelain | Moisture in damaged joints |
| Electric grout brush | $25-$100 | Repeated grout-line scrubbing | Excessive joint erosion |
| Professional extraction | $150-$500 typical minimum | Large or heavily soiled areas | Service cost and drying time |
| Rotary scrubber with grout brush | $300-$1,500 rental or purchase | Commercial floors | Splashing and surface damage |
Steam does not remove all grease without agitation and extraction, and it is unsuitable as a cure for failing grout. Use it only on sound, manufacturer-approved surfaces, keep the head moving, and extract loosened water afterward.
Common Mistakes and How to Fix Them
Using Vinegar on Every Tile
Vinegar can dissolve mineral deposits, but repeated acid exposure may etch natural stone and gradually affect cementitious materials. Use a pH-neutral cleaner for routine maintenance and reserve labeled acid products for compatible mineral deposits.
Using Chlorine Bleach as a Universal Grout Cleaner
Chlorine bleach can whiten some stains, but whitening does not equal soil removal. It can discolor colored grout, irritate airways, and damage nearby fabrics or metals. Oxygen bleach is often a better first choice for organic discoloration, while alkaline chemistry is better for grease.
Mixing Cleaning Chemicals
Never mix chlorine bleach with ammonia, acids, vinegar, alcohol, or other cleaners. Chemical mixtures can release hazardous gases or create heat and irritating vapors. Rinse the surface thoroughly before changing from one product category to another.
Leaving Cleaner or Dirty Water to Dry
Dried cleaner leaves residue, and dried dirty water can return soil to porous grout. Work in 10-20-square-foot sections, keep the solution wet during dwell time, and extract before moving to the next section.
Using a Wire Brush or Excessive Pressure
A wire brush can scratch glaze and gouge grout. Replace it with stiff nylon, and repair missing grout rather than trying to scrub the joint deeper.
Sealing Damp or Dirty Grout
Sealer can trap moisture or discoloration and cannot restore missing grout. Wait until the surface is fully dry, clean, and structurally sound; then test the sealer on a hidden area.
Why Is the Grout Still Dirty After Cleaning?
Grout that remains discolored after two careful cleaning cycles may have absorbed grease, developed efflorescence, retained moisture, or lost its original pigment. Additional scrubbing is not always the answer, particularly when the joint is soft, cracked, or visibly recessed.
| Symptom | Likely cause | Next action | Professional threshold |
|---|---|---|---|
| Yellow or brown grout | Deep grease or aged sealer | Use compatible alkaline degreaser | Color remains after two cycles |
| White powdery crust | Efflorescence | Dry brush, vacuum, investigate moisture | Recurs after drying |
| Black dots in grout | Mold, mildew, or embedded staining | Oxygen bleach and ventilation | Large area or recurring moisture |
| Uneven dark patches | Uneven absorption or damp substrate | Dry fully and test moisture source | Persistent dampness |
| Crumbling joints | Failed cement grout | Remove and regrout | More than isolated pinholes |
| Dull stone surface | Acid etching or abrasion | Stop chemicals and seek stone restoration | Visible polish loss |
Efflorescence is a moisture symptom, not ordinary dirt. Dry-brush the surface, vacuum the powder, and correct water movement before applying a specialty cleaner. Acid may remove the visible salt deposit while leaving the underlying moisture pathway untouched.
How Often Should Tile and Grout Be Cleaned?
Vacuum or sweep tiled floors several times per week, mop with a compatible neutral cleaner weekly, and deep-clean grout when visible soil remains after routine mopping, often every 3-12 months. Kitchens, entryways, rental turnovers, and heavily used bathrooms need shorter intervals.
Daily wiping prevents soap film in showers and grease accumulation behind cooking areas. Squeegeeing shower walls after use reduces mineral deposits, but it does not replace periodic grout cleaning or ventilation.
Seal frequency depends on grout porosity, traffic, cleaning chemicals, and water exposure. A penetrating sealer may last roughly 1-3 years in many residential areas, but a water-drop test is more useful than a calendar alone.
When Should You Hire a Professional?
Professional tile and grout cleaning is worthwhile when the area is large, grout is heavily packed with soil, extraction equipment is needed, or the surface includes delicate stone. Typical U.S. residential pricing is about $0.75-$3.00 per square foot, with small-job minimums often increasing the effective rate.
A professional can use controlled alkaline chemistry, rotary agitation, hot-water extraction, grout recoloring, or stone-specific restoration equipment. Ask what method will be used, whether the technician has experience with your stone, and how drying will be handled.
Cleaning cannot repair cracked tile, hollow tile, leaking showers, missing grout, damaged waterproofing, or permanently etched stone. Regrouting, caulk replacement, leak repair, or stone honing may be the correct service instead.
Frequently Asked Questions
Can I clean tile and grout with dish soap?
Yes, a small amount of mild dish soap can remove light surface film from glazed tile, but it is not ideal for repeated floor cleaning because its surfactants may leave residue. Use a pH-neutral tile cleaner for routine maintenance, and rinse thoroughly if dish soap is used.
Does baking soda whiten grout permanently?
Baking soda can lift surface soil through mild abrasion, but it does not permanently recolor stained or faded grout. A peroxide paste may improve small light-colored stains, while deeply discolored joints may require professional cleaning, colorant, or regrouting.
How do I clean grout without scrubbing?
Use dwell time, steam, or an electric brush to reduce manual effort, but some agitation is still required for embedded grout soil. A cleaner alone rarely removes compacted contamination from porous cement grout, and extraction remains necessary after any low-scrub method.
Can I use a magic eraser on tile grout?
A melamine sponge can remove marks from some tile faces, but it is an abrasive material and can wear grout or dull polished surfaces. Use it only for small marks after a hidden-area test, with light pressure and no aggressive back-and-forth grinding.
Should grout be sealed after every cleaning?
No. Seal grout only when it is clean, fully dry, absorbent, and compatible with the selected sealer. Over-sealing can leave residue or create a hazy surface, while epoxy grout and some presealed grout products generally do not need penetrating sealer.
What is the fastest way to clean bathroom grout?
The fastest safe approach is dry vacuuming, a compatible bathroom or oxygen-based cleaner, 10 minutes of controlled dwell time, nylon brushing, and wet extraction. Improving ventilation and replacing mold-damaged caulk usually produces a more durable result than repeatedly applying stronger chemicals.
The Bottom Line
The safest method for how to clean tile and grout is a controlled sequence: remove dry soil, match cleaner chemistry to the stain and surface, maintain dwell time, scrub with nylon, extract dirty water, rinse, and dry. Ceramic and porcelain allow the broadest cleaner choice, while natural stone requires pH-neutral care. Clean grout cannot compensate for leaks, failed joints, or damaged waterproofing.