
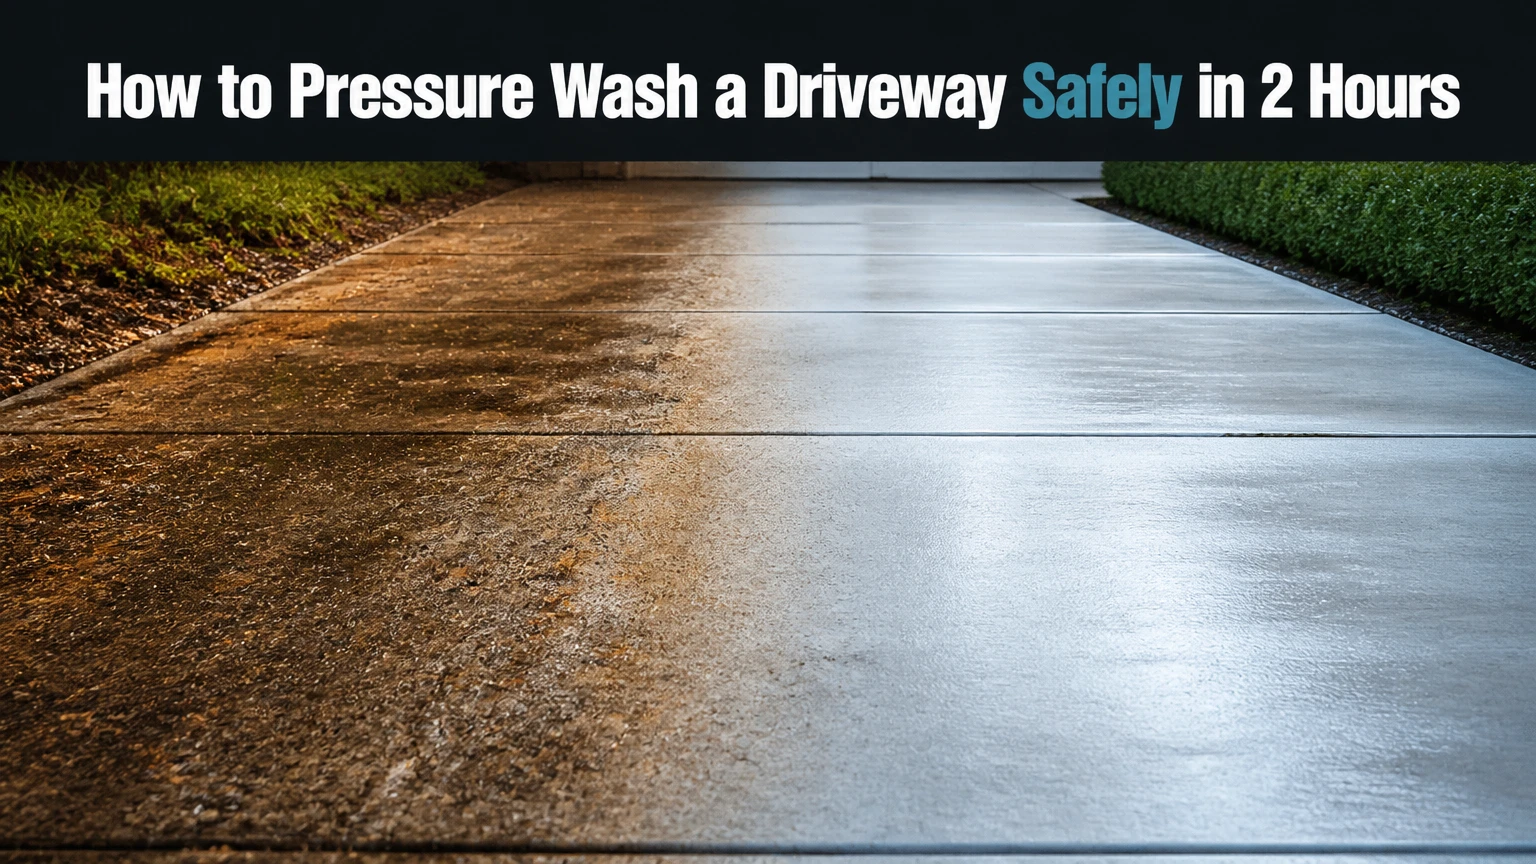
Pressure washing a driveway means using controlled water pressure, suitable detergent, and consistent overlapping passes to remove embedded soil, algae, tire marks, and some oil residue. A typical two-car concrete driveway takes 1.5-3 hours, including preparation and drying, when cleaned with a 2,000-3,000 PSI machine and a compatible surface cleaner.
Key Facts
A 2,000-3,000 PSI pressure washer with 2.0-2.8 GPM suits most residential concrete driveways.
Pressure washer damage usually comes from excessive pressure, a narrow nozzle, or holding the tip too close.
A surface cleaner produces more uniform results than a spray wand on broad, flat concrete.
Asphalt needs gentler treatment because high pressure can loosen aggregate and damage aged binder.
Paver joints may lose sand during washing, so stable joint material may need replacement afterward.
Never allow detergent or degreaser to dry, and never direct contaminated runoff into a storm drain.
What You Need Before Starting
A driveway pressure-washing project requires a pressure washer, water supply, personal protective equipment, surface-specific cleaner, and a way to control runoff. The correct machine is determined by the driveway material, area, stain type, and the attachment’s water-flow requirement, not by PSI printed prominently on the box.
Before You Start
| Requirement | Typical specification | Practical note |
|---|---|---|
| Time | 1.5-3 hours | Includes setup, washing, rinse, and cleanup |
| Difficulty | Moderate | Requires chemical handling and equipment control |
| Concrete washer | 2,000-3,000 PSI, 2.0-2.8 GPM | Suitable for most residential slabs |
| Surface cleaner | 12-16 inches, 2.0-3.0 GPM | Match the attachment to machine flow |
| Detergent | 1-2 gallons ready-to-use solution | Follow the product label |
| Water supply | 5/8-inch hose, unrestricted flow | Remove kinks and verify the inlet screen |
| Safety gear | Eye protection, gloves, long trousers, boots | Water can propel grit and broken concrete |
You also need a stiff nylon brush, a garden hose, absorbent material for fresh oil, plastic sheeting or covers for vulnerable fixtures, and a broom. Keep pets and children away until the surface is rinsed and no chemical residue remains.
A pressure washer’s cleaning units are calculated as PSI multiplied by GPM, but the result is only a rough comparison. A 2,200 PSI machine producing 2.5 GPM often cleans a driveway faster than a 3,000 PSI machine producing 1.5 GPM because the higher flow removes loosened slurry more efficiently.
Which Pressure Washer Is Best for a Driveway?
An electric pressure washer is usually the best choice for a small or regularly maintained concrete driveway, while a gas machine becomes more practical for large areas, heavy organic growth, or long uninterrupted cleaning sessions. Professional machines are rarely necessary for one household driveway.
| Machine type | Typical output | Best use | Main limitation |
|---|---|---|---|
| Compact electric | 1,500-2,000 PSI, 1.2-1.6 GPM | Small concrete areas, light dirt | Slow rinsing and limited detergent draw |
| Strong electric | 2,000-2,300 PSI, 1.6-2.3 GPM | One- or two-car driveway | Requires nearby outlet and extension precautions |
| Residential gas | 2,500-3,200 PSI, 2.3-2.8 GPM | Large or neglected concrete | Noise, fumes, fuel, and maintenance |
| Commercial gas rental | 3,000-4,000 PSI, 3.0-4.0 GPM | Large surfaces and difficult buildup | Can damage surfaces quickly if misused |
Choose the smallest machine that can run the selected surface cleaner at its required GPM. A large surface cleaner attached to a low-flow electric unit may leave dirty circular tracks because the spray bar cannot maintain effective speed.
A turbo nozzle can help with a small, persistent spot, but it should not replace a surface cleaner for the main driveway. The rotating zero-degree spray can etch concrete, remove asphalt binder, and displace paver sand.
What Do PSI and GPM Mean?
PSI describes impact pressure, while GPM describes water volume and rinsing capacity. Pressure breaks the bond between soil and the surface; flow carries the loosened material away, so increasing PSI alone does not guarantee faster or safer cleaning.
Use the machine’s adjustable pressure, nozzle distance, and test patch to control cleaning intensity. Start with the widest suitable spray pattern, then increase cleaning action gradually rather than beginning with a red zero-degree tip.
How to Pressure Wash a Driveway Safely
The safest process has six stages: inspect and clear the area, pretreat stains, apply detergent, edge the perimeter, clean the main surface, and rinse completely. A two-car concrete driveway commonly needs 30-45 minutes of washing plus 20-40 minutes for preparation and cleanup.
Step 1: Inspect, Clear, and Protect the Area
Remove vehicles, bins, toys, planters, mats, loose gravel, and movable decorations. Sweep the driveway with a stiff broom, then inspect for cracks, loose concrete, failed joints, exposed aggregate, and areas where the surface has already delaminated.
Wet nearby grass and plants with clean water before applying any cleaner. Cover outdoor outlets, doorbell wiring, low-voltage fixtures, and vulnerable door thresholds without blocking ventilation around a gas engine.
Check where water will flow. Use absorbent material, temporary barriers, or a wet vacuum if oily runoff could reach a storm drain, pond, or neighbor’s property.
Success checkpoint: The driveway is free of loose debris, people, pets, vehicles, and fragile objects, and runoff has a controlled route.
Common mistake: Washing before checking for loose concrete. High-pressure water can enlarge a weak edge or remove the surface cream from a spalled slab.
Step 2: Pretreat Oil, Rust, and Organic Growth
Pretreatment improves results because different stains respond to different chemistry. Apply a concrete-safe degreaser to oil, an approved rust remover to iron staining, and a labeled outdoor cleaner for algae or mildew.
Blot fresh oil with clay absorbent, cat litter, or another oil-absorbing product before adding water. Scrub degreaser with a nylon brush for 5-10 minutes and keep the area wet for the label’s stated dwell time, commonly 10-20 minutes.
Do not assume household bleach, pool shock, acids, or mixed cleaners are interchangeable. Sodium hypochlorite can damage plants, metals, fabrics, and skin; never mix it with acids, ammonia, or other cleaners. Follow the product label, wear chemical-resistant gloves and eye protection, and rinse landscaping before and after treatment.
Rust may remain partly visible after pressure washing because iron oxide can chemically bond with concrete. Use only a product labeled for the driveway material and test an inconspicuous patch first.
Success checkpoint: Oil has softened, organic growth has changed appearance, and the pretreatment remains wet without damaging the test area.
Common mistake: Using acid on unknown concrete. Acid can change color, expose aggregate, and create a lighter or rougher patch.
Step 3: Apply Driveway Detergent
Connect a concrete-compatible detergent through the manufacturer-approved injector or downstream applicator. Install the low-pressure soap nozzle, commonly black, because many injectors will not draw detergent through a high-pressure tip.
On a sloped driveway, apply detergent from the low end upward in manageable sections. This keeps the working surface evenly wet and limits clean streaks caused by detergent-laden water running over untreated areas.
Allow approximately 5-10 minutes of dwell time unless the label specifies another period. Keep detergent wet with a light mist, and stop applying if wind carries spray toward plants, vehicles, doors, or neighboring property.
Success checkpoint: The cleaner has visibly loosened soil and remains wet across the section without drying into a film.
Common mistake: Applying soap across the entire driveway at once. Work in 100-200 square-foot sections so dwell time stays controlled.
Step 4: Edge the Driveway With Controlled Pressure
Switch to a 25-degree green nozzle for sound concrete, or use the surface cleaner near broad edges if its housing will not strike walls or landscaping. Hold a spray wand approximately 12 inches away at first, and keep the spray directed away from garage seals, siding, doors, and loose joints.
Edge around the perimeter with slow, even movements. Avoid concentrating the stream at expansion joints, cracks, or the bottom edge of an asphalt driveway where water can undermine the surface.
A clean perimeter gives the main cleaning passes a clear boundary, but edging is not an excuse to use a zero-degree nozzle. Narrow spray angles increase cutting power and increase the chance of permanent marks.
Success checkpoint: Edges look consistently cleaner without exposed aggregate, lifted joint sand, damaged sealant, or loosened asphalt.
Common mistake: Tilting the wand so the spray hits a wall or garage door. Water can force debris behind trim and damage weather seals.
Step 5: Clean the Main Surface
For concrete, use a surface cleaner whenever possible. Walk in straight, slow passes like mowing a lawn, overlap each pass by approximately 1-2 inches, and keep the attachment level so its rotating spray bars remain evenly spaced from the slab.
When using a wand, select a 25-degree nozzle for sound concrete and a 40-degree nozzle for older, delicate, or uncertain surfaces. Keep the tip 8-12 inches above concrete, use overlapping horizontal sweeps, and clean sections no larger than roughly 4 by 4 feet.
Start with the least aggressive setting that removes soil. A nozzle held too close can strip the thin cement-rich surface layer, exposing coarse aggregate and creating pale or rough lines. Move the wand continuously; stopping over one spot concentrates energy.
| Surface | Starting approach | Typical pressure limit | Technique |
|---|---|---|---|
| Sound concrete | 25-degree nozzle or surface cleaner | 2,000-3,000 PSI | Test at 12 inches, then adjust |
| Aged concrete | 40-degree nozzle | 1,500-2,500 PSI | Use slower passes and greater distance |
| Asphalt | 40-degree nozzle, low pressure | Often below 2,000 PSI | Avoid cutting the binder or aggregate |
| Clay or concrete pavers | 40-degree nozzle | 1,200-2,000 PSI | Keep spray away from joint gaps |
| Exposed aggregate | Surface cleaner, gentle setting | 1,500-2,500 PSI | Avoid lifting loose stones |
These values are starting ranges, not universal guarantees. Surface age, sealant, weathering, aggregate condition, and machine nozzle size can change the result, so test a 1-2 square-foot hidden area and let it dry before cleaning the whole driveway.
Success checkpoint: The cleaned section has an even color after several minutes of drying, with no stripes, gouges, displaced sand, or exposed aggregate.
Common mistake: Moving too quickly with a surface cleaner. Fast passes leave dark bands because the rotating nozzles do not give each area enough dwell time.
Step 6: Rinse From the High End Downward
Switch to a wide spray pattern or remove detergent from the system, then rinse from the highest part of the driveway toward the street or approved drainage area. Flush dirty slurry from joints, edges, and low spots rather than allowing residue to dry on the surface.
Rinse adjacent vegetation with clean water. Continue until runoff is free of visible foam, cleaner, and suspended dirt, then inspect the slab from several angles while it is still wet.
A driveway may look uneven while wet because porous concrete dries at different rates. Wait until the surface is substantially dry before deciding whether a second pass is needed.
Success checkpoint: No detergent film remains, water flows without pooling caused by debris, and the surface shows no untreated bands.
Common mistake: Rinsing from the bottom upward. That can push dirty water over sections already cleaned.
How Should You Clean Concrete, Asphalt, and Pavers?
Concrete tolerates the most cleaning pressure, asphalt requires low-impact washing, and pavers demand special attention to joint sand. The material’s condition matters as much as its label, because aged asphalt and loose pavers can fail under pressure that sound surfaces tolerate.
Concrete Driveways
Use a surface cleaner and a 25-degree nozzle for sound concrete. Oil stains may need repeated degreasing because pressure washing removes surface residue but cannot always extract oil that has migrated deeply into porous cement.
Do not pressure wash freshly placed concrete. Follow the concrete contractor’s curing instructions, commonly at least 28 days, before using aggressive water cleaning.
Asphalt Driveways
Use a wide spray pattern, low pressure, and a greater working distance. Asphalt depends on a bituminous binder that can soften, erode, or expose aggregate when struck by concentrated high-pressure water.
Avoid hot water unless the equipment and pavement manufacturer approve it. Never use a turbo nozzle on asphalt, and do not expect pressure washing to repair cracking, raveling, potholes, or widespread oxidation.
Paver Driveways
Use a 40-degree nozzle or a correctly sized surface cleaner at conservative pressure. Keep the spray moving across joints, because a stationary stream can remove bedding sand and joint sand.
Allow pavers to dry before sweeping replacement joint sand. Polymeric sand requires clean, correctly sized joints and proper activation according to its label; pressure washing alone does not restore joint stability.
What Removes Oil, Rust, Moss, and Tire Marks?
Degreaser works best on oil, specialty rust remover works on iron discoloration, and detergent or biocidal treatment works on algae and moss. Tire marks often need a concrete-safe alkaline cleaner and agitation, while permanent shadowing may remain after the contaminant is removed.
| Stain | First treatment | Dwell or action | Likely limitation |
|---|---|---|---|
| Fresh oil | Absorbent, then degreaser | Blot, scrub 5-10 minutes | Deep oil may need multiple treatments |
| Old oil | Alkaline concrete degreaser | 10-20 minutes, keep wet | May leave a darker shadow |
| Rust | Labeled oxalic or citric remover | Label-directed, often 2-10 minutes | Acid can alter concrete color |
| Algae or moss | Labeled outdoor cleaner | 5-15 minutes, then rinse | Roots can remain in cracks |
| Tire marks | Concrete-safe cleaner and nylon brush | 5-10 minutes | Hot rubber may have chemically marked sealer |
| Efflorescence | Dry brushing or masonry cleaner | Product-specific | Water can temporarily worsen salts |
Do not scrub oil with a wire brush. Steel bristles can embed metal fragments that later rust and create new stains.
Surface Cleaner or Spray Wand: Which Works Better?
A surface cleaner is usually better for broad concrete because its enclosed rotating nozzles distribute cleaning action evenly, while a spray wand is better for corners, edges, steps, and spot treatment. The attachment must match the pressure washer’s flow or it will clean slowly and unevenly.
| Tool | Typical coverage | Best use | Main risk |
|---|---|---|---|
| 12-inch surface cleaner | 200-350 square feet/hour | Small residential concrete | Slow if machine flow is too low |
| 16-inch surface cleaner | 300-600 square feet/hour | Two-car and larger driveways | Requires adequate GPM |
| 25-degree wand tip | 100-250 square feet/hour | Edges and narrow areas | Zebra striping |
| 40-degree wand tip | 100-220 square feet/hour | Delicate surfaces | May require more passes |
| Turbo nozzle | 20-60 square feet/hour | Small stubborn spots | Etching and gouging |
Coverage figures are typical field ranges, not guarantees. Surface condition, operator speed, hose length, detergent dwell, and rinse requirements can change total time substantially.
Common Mistakes and How to Fix Them
Most driveway damage comes from excessive concentration of water rather than insufficient machine power. Correcting technique usually works better than buying a larger pressure washer.
- Starting with the red zero-degree nozzle: Replace it with a 25- or 40-degree tip and test on a hidden area.
- Holding the wand under 6 inches from concrete: Move back to 8-12 inches and use overlapping passes.
- Leaving detergent to dry: Re-wet the area, allow several minutes of softening, then rinse with a wide spray.
- Creating tiger stripes: Slow the wand, overlap each pass by 50%, or use a surface cleaner.
- Losing pressure: Remove hose kinks, clean the inlet screen, open the water supply fully, and verify adequate flow.
- Pulsing or shaking: Purge trapped air by running water through the gun until the stream is steady before restarting the pump.
- Soap not siphoning: Confirm the injector is installed correctly, the tube is submerged, and the black low-pressure nozzle is fitted.
- Running a gas washer unattended: Release the trigger and shut the engine off during pauses. A bypassing pump can overheat if the machine remains idle for several minutes.
A pressure washer should never be aimed at skin, footwear, animals, electrical fixtures, vehicle tires, or windows. The American Society of Safety Professionals treats high-pressure water injection as a serious penetrating-injury hazard, even when the wound appears small.
When Should You Hire a Professional?
Hire a professional when the driveway has extensive oil saturation, unstable asphalt, delicate decorative concrete, difficult runoff, or a large area requiring commercial equipment. Professional cleaning is also sensible when chemical treatment could reach a storm drain or when the surface already has spalling and exposed aggregate.
| Project choice | Typical cost | Typical duration | Best situation |
|---|---|---|---|
| Own an electric washer | $100-$250 equipment | 2-4 hours | Annual maintenance on a small driveway |
| Rent a gas washer | $40-$90 per day | 1.5-3 hours | Large neglected concrete area |
| Rent a surface cleaner | $20-$30 per day | Included with project | Broad flat surfaces |
| Buy cleaners and supplies | $15-$40 | 30-60 minutes setup | Targeted stain treatment |
| Hire a professional | $150-$400 typical residential range | 45 minutes-2 hours onsite | Large, stained, or fragile surfaces |
Prices vary by region, driveway size, access, and stain severity. Ask whether the quoted service includes pretreatment, surface cleaning, runoff management, and sealing, because a low washing-only quote may exclude the work that determines the final result.
What Should You Do After Washing?
Allow the driveway to dry fully before judging color, replacing paver sand, or applying sealer. Concrete commonly needs 24-48 hours of dry weather before sealing, while the sealer label controls the actual moisture requirement.
Repair cracks and spalled areas before sealing. Pressure washing cannot restore missing concrete paste, replace asphalt binder, stabilize a sinking slab, or remove deep oil that has permanently darkened the material.
Apply sealer only when the surface is clean, dry, and structurally sound. Sealing a damp driveway can trap moisture, create whitening, and reduce adhesion.
For routine maintenance, sweep monthly, remove oil promptly, and wash when algae or embedded soil becomes slippery. Many residential driveways need cleaning every 12-24 months, but shaded, damp, or heavily trafficked surfaces may require shorter intervals.
FAQ
Can I Pressure Wash a Driveway With a Garden Hose?
A garden hose can rinse loose dust and surface debris but usually cannot remove embedded algae, tire marks, or bonded oil. A pressure washer increases impact energy through a restricted nozzle, while detergent and brushing handle the chemical and mechanical parts of stain removal.
How Long Should I Wait Before Parking on a Clean Driveway?
Wait until the driveway is visibly dry, usually at least 24 hours in mild, dry weather. Avoid parking sooner when the slab remains damp, detergent was used heavily, temperatures are low, or a sealer has been applied, because tires can mark soft coatings and trap moisture.
Can Pressure Washing Remove Weeds From Driveway Cracks?
Pressure washing can remove visible weeds and loose soil from cracks, but it does not reliably kill roots. Remove remaining roots manually, allow the joints to dry, and use a suitable joint treatment or replacement sand that is compatible with the driveway material.
Why Does Concrete Look Patchy After Pressure Washing?
Patchy concrete usually reflects different porosity, previous staining, uneven nozzle distance, or cleaning bands that become more visible as the slab dries. Wait until dry, then re-clean the entire affected section with consistent passes instead of treating isolated pale spots.
Should I Seal a Driveway After Pressure Washing?
Sealing is optional for sound concrete and may help reduce water and stain absorption, but sealing will not repair cracks or hide severe discoloration. Follow the sealer manufacturer’s moisture, temperature, coverage, and curing requirements, and wait until the driveway is fully dry.
Is Pressure Washing Safe for a Cracked Driveway?
Pressure washing is generally safe at moderate settings when cracks are stable, but concentrated spray can widen weak cracks and remove loose edges. Use a wide nozzle, maintain distance, avoid directing water into open joints, and repair serious damage before cleaning.
The Bottom Line
To pressure wash a driveway safely, match pressure and water flow to the surface, pretreat stains, keep detergent wet, clean in consistent overlapping passes, and rinse from the high end downward. Use a surface cleaner for broad concrete, gentler technique for asphalt and pavers, and stop when the surface or runoff indicates damage.