
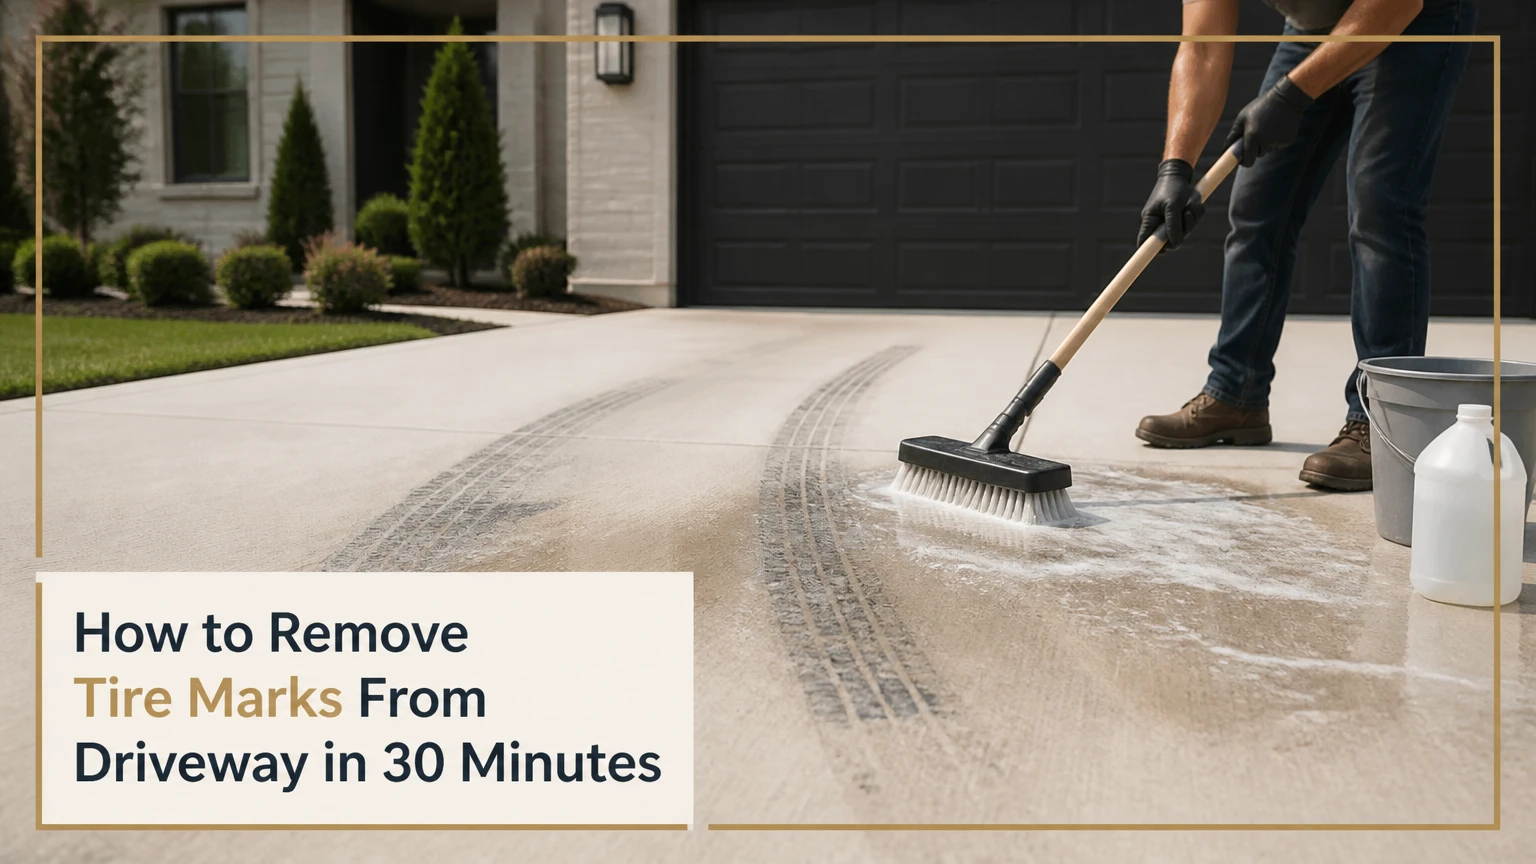
To remove tire marks from a driveway, sweep the area, wet the surface, apply a concrete-safe degreaser, let it dwell for 10-15 minutes, scrub with a nylon brush, and rinse thoroughly. Fresh rubber transfer usually comes off in one or two treatments; old marks embedded in sealer or porous concrete may require pressure washing or professional restoration.
Key Facts
Black tire marks usually contain rubber additives and plasticizers transferred from warm tires, not ordinary road dirt.
A nylon brush and labeled alkaline or citrus degreaser are safer starting tools than a wire brush or undiluted solvent.
Pressure washing should begin with the lowest effective setting and a test patch, because excessive pressure can etch concrete and damage asphalt.
Asphalt requires an asphalt-safe cleaner; petroleum solvents can soften or dissolve its binder.
Cleaner must remain wet during its stated dwell time, because dried residue can redeposit dissolved rubber in surface pores.
A faint shadow after cleaning can indicate sealer discoloration or absorbed rubber rather than remaining surface dirt.
Why Do Tires Leave Black Marks?
Tires leave black marks when heat, pressure, and friction move rubber compounds onto the driveway surface. During braking, turning, or parking on a hot surface, the tire tread warms and releases small amounts of plasticizer, carbon black, and rubber residue that adhere to concrete sealer, asphalt, pavers, or coating materials.
The transfer is often called plasticizer migration or hot-tire pickup. A sealed driveway may show sharper, darker marks because the residue sits on the sealer film. Unsealed concrete can absorb the oily component into pores, producing a stain that remains after the visible rubber disappears.
Fresh marks are easier to remove because the residue has not weathered, compacted, or penetrated deeply. Sunlight can bake the residue into a sealer, while repeated driving can press it into textured concrete and exposed aggregate. A tire mark is also different from an oil leak: tire marks usually follow tread contact or turning arcs, whereas engine oil forms irregular spots beneath a vehicle.
What Should You Check Before Cleaning?
Identify the driveway material and coating before choosing a chemical or machine. A cleaner that is acceptable on bare concrete can discolor acrylic sealer, soften asphalt, strip paint, or leave pale patches on pavers.
Inspect the Surface
Use these quick checks before applying any product:
- Look at the pattern. Tread-shaped lines or curved black arcs suggest rubber transfer.
- Check the finish. Gloss, color enhancement, or a uniform film usually indicates sealer.
- Press a fingernail into a mark. A raised, tacky deposit is surface transfer; a flat shadow may be absorbed residue or discoloration.
- Test water absorption. On a hidden spot, place a teaspoon of water. Rapid darkening suggests porous concrete; beading suggests sealer or coating.
- Check the age. Marks less than a week old generally need less dwell time and fewer applications than marks exposed for months.
Do not clean newly poured concrete until the contractor or product manufacturer permits washing. Concrete continues gaining strength after the initial cure, and aggressive cleaning can damage a weak surface or disturb curing compounds.
Which Cleaner Fits the Driveway?
The safest first choice is a product whose label specifically names the driveway material. “Degreaser” alone does not prove asphalt, decorative concrete, or painted coatings are compatible.
| Driveway surface | First-choice cleaner | Avoid initially | Typical dwell time |
|---|---|---|---|
| Bare concrete | Diluted alkaline concrete degreaser | Undiluted solvent | 10-15 minutes |
| Sealed concrete | Mild pH-neutral or citrus cleaner labeled for sealer | Strong caustic or solvent | 5-10 minutes |
| Asphalt | Asphalt-safe detergent cleaner | Mineral spirits, gasoline, strong petroleum solvent | 5-10 minutes |
| Concrete pavers | Mild detergent or paver-safe degreaser | Acid cleaner and untested solvent | 5-10 minutes |
| Painted or coated surface | Coating manufacturer’s cleaner | Pressure washer and solvent without approval | 3-5 minutes |
| Exposed aggregate | Diluted neutral or mild alkaline cleaner | Wire brush and aggressive turbo nozzle | 5-10 minutes |
Product labels control dilution, dwell time, protective equipment, and disposal. The ranges above are typical starting points, not replacements for the label.
How to Remove Tire Marks From a Driveway
The standard process takes about 30-60 minutes for a small area, excluding repeated treatments and drying. Use a broom, hose, bucket, labeled cleaner, measuring cup, nitrile gloves, eye protection, and a stiff nylon deck brush; a pressure washer is optional.
Step 1: Remove Loose Dirt
Sweep the tire marks and the surrounding driveway until no loose grit remains. Grit trapped under a brush can scratch sealer or create a misleadingly dirty rinse.
Protect nearby grass, shrubs, drains, and painted walls with plastic sheeting or absorbent barriers. Do not block a storm drain with a material that sends concentrated cleaner into another outlet.
You will know it worked when: the surface contains only bonded marks and no loose sand or leaves.
Common mistake: Beginning with chemicals on a dusty surface, which spreads grit and increases scrubbing damage.
Step 2: Perform a Test Patch
Dilute the cleaner exactly as directed, then apply it to an inconspicuous area of approximately 12 by 12 inches. Leave it for the shortest recommended dwell time, scrub lightly, and rinse completely.
Wait until the patch dries before judging color. Wet concrete and wet sealer can appear darker, lighter, or cloudier than the finished surface.
You will know it worked when: the tire mark lightens without a change in gloss, color, texture, or aggregate.
Common mistake: Testing only whether the mark disappears while ignoring sealer haze or color loss.
Step 3: Wet the Surrounding Surface
Rinse the driveway with clean water, especially on warm, sunny days. Pre-wetting reduces rapid absorption and helps prevent the cleaner from drying before it can emulsify rubber residue.
Do not create a flood. Excess water can carry dissolved residue toward lawns, drains, or neighboring property.
You will know it worked when: the driveway is evenly damp and no large puddles remain.
Common mistake: Applying concentrated cleaner to dry concrete, where the chemical can penetrate unevenly and leave a halo.
Step 4: Apply the Cleaner
Mix only the quantity needed for the treatment. For a small tire mark, begin with about 1 cup of diluted cleaner; larger driveways may require roughly 1-2 quarts per 100 square feet, depending on product concentration and surface porosity.
Spread the cleaner beyond the visible edge by 2-3 inches so the cleaned area does not develop a sharp boundary. Keep the product off plants and do not combine cleaners, especially products containing bleach, acids, ammonia, or solvents.
You will know it worked when: the mark becomes wet and begins to soften without immediate surface discoloration.
Common mistake: Using more chemical instead of improving dwell time or agitation.
Step 5: Allow Controlled Dwell Time
Let the cleaner remain wet for the label’s stated period, commonly 5-15 minutes. A heavily weathered mark may need a second application, but allowing one coat to dry is not a substitute for repeat treatment.
Mist lightly with water if the label permits and the surface starts drying. Do not extend dwell time on sealed, painted, or asphalt surfaces without product guidance.
You will know it worked when: the rubber residue looks softened, gray, or smeared rather than sharply black.
Common mistake: Walking away while the cleaner dries, which can leave a chemical outline or redeposit loosened oils.
Step 6: Scrub With Nylon
Agitate the mark using a stiff nylon deck brush, working in several directions across the tread pattern. Use firm pressure, but do not grind the brush into decorative coatings or loose paver joints.
For textured concrete, a smaller nylon grout brush can reach recesses more effectively than a broad broom. Rinse the brush periodically so it does not redistribute suspended rubber.
You will know it worked when: the dark residue transfers into the cleaning slurry and the original surface texture becomes visible.
Common mistake: Choosing steel or brass bristles. Metal can scratch finishes, expose aggregate, and leave particles that later rust.
Step 7: Rinse and Evaluate
Rinse from the cleanest edge toward the dirty collection area using a garden hose or controlled low-pressure spray. Collect or redirect dirty water according to local stormwater rules, and keep concentrated runoff away from soil and waterways.
Allow the surface to dry fully before deciding whether the treatment succeeded. Repeat the cleaner and nylon-brush cycle once if the mark has clearly lightened; switch methods only after confirming the surface is compatible.
You will know it worked when: no slippery cleaner remains, the mark is substantially lighter, and the surface finish matches the surrounding area.
Common mistake: Rinsing incompletely, leaving alkaline residue that can create a pale film or attract dirt.
Which Removal Method Is Best?
Chemical treatment is usually the best first method for rubber transfer on concrete because it softens the residue before mechanical action. Pressure washing is useful for textured or porous surfaces, while household detergent is a low-risk trial for fresh marks but often lacks the strength needed for old stains.
| Method | Typical cost | Small-area time | Best use | Main risk |
|---|---|---|---|---|
| Dish detergent and hot tap water | $0-$10 | 30-60 minutes | Fresh marks on sealed concrete | Repeated scrubbing |
| Labeled concrete degreaser | $10-$40 per gallon | 30-60 minutes | Bare concrete and moderate marks | Sealer discoloration |
| Citrus-based cleaner | $15-$40 per gallon | 30-60 minutes | Light-to-moderate marks on compatible sealer | Slippery residue or plant harm |
| Pressure-washer rinse | $40-$100 per day rental | 30-90 minutes | Textured concrete and broad areas | Etching or coating loss |
| Professional hot-water cleaning | $150-$400 typical service range | 1-3 hours onsite | Large, old, or sensitive jobs | Higher cost |
| Sealer spot restoration | $100-$500 typical repair range | 1-2 days including cure | Permanent sealer pickup or white haze | Visible repair boundary |
Costs vary with region, access, driveway size, chemical quantity, and whether runoff recovery is required. Professional hot-water equipment can improve removal, but heat does not make an incompatible chemical safe for asphalt or decorative coatings.
Can Dish Soap Remove Tire Marks?
Dish soap can remove fresh, shallow tire marks when hot tap water and mechanical scrubbing loosen the oily residue. Apply a small amount of concentrated detergent to the damp mark, scrub for 5-10 minutes, and rinse before the soap dries.
Dish soap is a sensible low-cost first trial on sealed concrete and some pavers. It is less effective on old marks that have entered porous concrete or bonded to a sealer, and excessive detergent can create a slippery film. Use hot tap water rather than boiling water: boiling water can soften some sealers, injure the user, and create thermal shock on cold concrete or coated surfaces.
Baking soda can add mild abrasive action, but it is not a powerful solvent. Mix it with detergent into a spreadable paste, test first, and avoid aggressive pressure that dulls a glossy finish.
Is Pressure Washing Safe?
Pressure washing is safe only when the machine, nozzle, distance, and surface are matched through a test patch. Start with a wide fan nozzle and the lowest pressure that removes residue; never assume a 2,500-3,000 PSI machine should be used at full output.
| Surface | Conservative starting pressure | Nozzle approach | Minimum test distance |
|---|---|---|---|
| Bare concrete | 1,500-2,000 PSI | 25-degree fan | 12 inches |
| Sound unsealed concrete | 2,000-2,500 PSI | 25-degree fan | 12 inches |
| Sealed or stamped concrete | 800-1,500 PSI | 40-degree fan | 18 inches |
| Asphalt | 1,000-1,500 PSI | 25-40-degree fan | 18 inches |
| Concrete pavers | 1,000-1,500 PSI | 25-40-degree fan | 18 inches |
| Painted coating | Manufacturer-specified only | Usually garden hose | 24 inches if permitted |
The settings are conservative practitioner starting points. A machine’s actual cleaning force also depends on flow rate, nozzle size, surface age, and operator speed. A rotating turbo nozzle concentrates impact and should not be the first tool on sealer, asphalt, pavers, or decorative concrete.
Keep the wand moving in overlapping passes. Holding a tip closer than about 12 inches can create visible stripes in concrete, while concentrated spray can remove asphalt binder or wash sand from paver joints.
How Do Asphalt and Decorative Surfaces Change the Method?
Asphalt and decorative surfaces require less aggressive cleaning than bare concrete because their binders, coatings, pigments, and joint materials can be damaged before the tire mark is gone. Asphalt-safe detergent and gentle agitation are safer than petroleum solvent or high-pressure blasting.
Asphalt Driveways
Use an asphalt-compatible detergent, soft-to-medium nylon brush, and controlled rinse. Work in shade when possible, because hot asphalt can soften and make the surface more vulnerable to pressure and abrasion.
Avoid gasoline, lacquer thinner, strong citrus solvent, and unapproved degreasers. Petroleum-based solvents can soften the asphalt binder, produce a shiny patch, and accelerate raveling. If the black area is broad, slick, and not shaped like a tire, the issue may be asphalt bleeding rather than transferred rubber. Cleaning will not reverse binder migration.
Sealed, Stamped, or Colored Concrete
Treat the sealer as the vulnerable surface. Begin with a mild cleaner, short dwell time, soft nylon agitation, and low-pressure rinse; a strong degreaser can remove or dull acrylic sealer even when the underlying concrete remains intact.
Stamped concrete has recessed joints that collect residue, but high pressure can expose edges and create patchy gloss. If a test patch turns cloudy, chalky, or lighter, stop cleaning and allow the area to dry. Further chemical action may enlarge the damaged patch.
Pavers and Exposed Aggregate
Pavers can tolerate localized brushing, but aggressive rinsing may remove joint sand or expose an uneven pattern. Use a paver-safe cleaner and rinse across the surface rather than directly into joints.
Exposed aggregate has irregular texture that traps rubber. A small nylon brush often performs better than high pressure because it reaches recesses without stripping the cement paste around aggregate stones.
What If the Mark Does Not Come Off?
A remaining mark after two compatible treatments usually indicates penetration, sealer involvement, asphalt bleeding, or a misidentified stain. Do not escalate immediately to stronger solvent or higher pressure; diagnose the failure first.
| Symptom after cleaning | Likely cause | Safe next action | Do not do |
|---|---|---|---|
| Faint tread-shaped shadow | Rubber absorbed into pores | Repeat once, then consider poultice or professional cleaning | Scrub until the surface changes |
| Glossy dark patch | Asphalt bleeding or sealer pickup | Compare with nearby finish and consult a paving or sealing contractor | Apply petroleum solvent |
| White or cloudy area | Sealer blush, residue, or coating damage | Rinse, dry, and contact the sealer manufacturer | Apply xylene without approval |
| Clean stripes | Pressure-washer etching | Stop and assess entire panel | Blend with more high pressure |
| Brown-orange specks | Metal contamination or rust | Use a labeled rust remover only after testing | Use a wire brush |
| Soft or sticky asphalt | Chemical attack or heat damage | Stop, shade the area, and seek asphalt advice | Continue degreasing |
A shadow stain may require a concrete poultice, sealer removal, surface cleaning, and resealing. Spot resealing can create a visible gloss difference, so restoration across a defined architectural section may look better than a tiny patch.
White blushing under a sealer is not automatically fixed by xylene. Xylene and sealer rejuvenators are flammable, hazardous solvents that can dissolve more coating, spread the defect, or violate the sealer manufacturer’s instructions. Use them only when the product documentation specifically permits the treatment and ventilation, fire-safety, and protective-equipment requirements can be met.
What Mistakes Permanently Damage a Driveway?
The most expensive mistakes are chemical incompatibility, excessive pressure, metal brushing, and incomplete rinsing. Each mistake can damage the substrate or finish before the rubber residue is removed.
- Using a wire brush: Steel or brass can scratch sealer and concrete, expose aggregate, and leave rust-producing fragments.
- Using acid cleaner: Acid may brighten or etch cement paste, but it is not a dependable rubber remover and can damage decorative finishes.
- Using solvent on asphalt: Solvent can dissolve binder and leave a soft, crumbly, or shiny patch.
- Holding the pressure tip too close: Concentrated water creates etching lines and removes sealer in isolated bands.
- Letting cleaner dry: Dried surfactant and dissolved rubber can leave a pale or dark boundary.
- Skipping runoff control: Cleaner and suspended residue can damage plants and enter stormwater systems.
- Repeating without drying: A wet surface hides color changes and makes sealer damage difficult to recognize.
A practitioner rule is to increase dwell time or repeat a compatible treatment before increasing pressure. Mechanical force is easier to control after the residue has been chemically softened.
How Can You Prevent New Tire Marks?
Preventing hot-tire pickup requires reducing tire heat, lateral friction, and contact with vulnerable sealer. Avoid turning the steering wheel while stationary, let tires cool after towing or repeated braking, and park on a fully cured, compatible driveway sealer.
Concrete sealer selection matters. Ask the installer whether the product is rated for hot-tire pickup, tire staining, UV exposure, and the driveway’s expected traffic. Follow the manufacturer’s cure period before parking vehicles; a sealer that feels dry can remain chemically soft underneath.
Use wheel stops carefully. Rubber or plastic stops can themselves transfer marks, so choose a product designed for outdoor paving and anchor it without damaging the slab. Correct tire inflation and smooth low-speed turns reduce tread scrub, although they cannot eliminate transfer from very hot tires.
A new mark should be treated early, but prevention does not justify frequent solvent cleaning. Repeated aggressive cleaning can shorten the life of a sealer faster than occasional tire marks would.
When Should You Hire a Professional?
Hire a professional when the driveway has widespread old marks, a valuable decorative finish, asphalt damage, coating failure, difficult runoff conditions, or an area larger than a practical DIY test. A contractor with hot-water recovery equipment can often reduce scrubbing while controlling wastewater more effectively than a rented cold-water washer.
Ask for four specifics before approving work:
- The exact driveway material and coating the contractor assumes.
- The proposed pressure, temperature, nozzle, and chemical.
- How the contractor will contain or dispose of dirty runoff.
- Whether spot cleaning, sealer repair, or full-area resealing is included.
A credible contractor should test a small area and explain the possibility of a remaining shadow. No cleaning method can guarantee removal when rubber has permanently altered a sealer or when asphalt binder has already migrated.
How Much Time and Money Does Removal Take?
A fresh, localized mark generally costs $0-$40 and takes 30-60 minutes for a homeowner using detergent or a labeled cleaner. Old marks, large driveways, pressure-washer rental, and sealer repair increase both labor and cost.
| Project situation | Materials or service | Typical total time | Typical cost |
|---|---|---|---|
| One fresh mark | Detergent, brush, hose | 30-45 minutes | $0-$10 |
| Several concrete marks | Degreaser, nylon brush, hose | 45-90 minutes | $10-$40 |
| Textured concrete cleaning | Rented pressure washer and cleaner | 1-3 hours | $40-$100 |
| Asphalt treatment | Asphalt-safe cleaner and brush | 45-90 minutes | $10-$35 |
| Large or old stain pattern | Professional cleaning | 1-3 hours onsite | $150-$400 |
| Sealer restoration | Stripping, cleaning, resealing | 1-2 days | $100-$500 for a repair area |
The lowest-cost method is not always the lowest-cost decision. Spending $20 on a compatible cleaner is cheaper than repairing a stripped sealer or softened asphalt patch.
FAQ
Will WD-40 remove tire marks from concrete?
WD-40 may loosen some rubber residue because it contains petroleum-based solvents, but it can leave an oily film and create a new stain that attracts dirt. Do not use it as a first choice on porous concrete, sealed surfaces, asphalt, or pavers. Choose a labeled concrete or asphalt cleaner instead.
Does bleach remove black tire marks?
Bleach can disinfect and lighten organic discoloration, but tire marks are primarily rubber and oily transfer, so bleach is usually a poor remover. Bleach may also damage nearby plants, discolor colored concrete, and react dangerously with other cleaners. Never mix bleach with ammonia, acids, or unknown degreasers.
Can I remove tire marks with a magic eraser?
A melamine foam eraser can reduce a tiny mark on a smooth, light-colored sealed surface, but it works by abrasion and may dull gloss. It is unsuitable for large areas, textured concrete, asphalt, or delicate coatings. Test a hidden spot and stop if the finish changes.
How long should I wait before parking on resealed concrete?
Follow the sealer manufacturer’s cure schedule, because traffic readiness varies with product chemistry, temperature, humidity, and film thickness. Many residential sealers need at least 24-48 hours before vehicle traffic, while cool or humid conditions can require longer. A dry-looking surface is not proof of full cure.
Are tire marks the same as oil stains?
Tire marks usually appear as tread-shaped lines, turning arcs, or dark bands where rubber contacted the pavement. Oil stains are commonly irregular pools or spots beneath an engine, transmission, or wheel hub. Both can contain oily compounds, but the correct cleaner and treatment intensity may differ.
Can rain remove tire marks?
Rain may wash away loose dirt around a tire mark, but it rarely removes bonded rubber or plasticizer residue. Repeated wetting can spread the residue into pores and make the outline less distinct without reducing the total stain. Clean the area after sweeping rather than relying on rainfall.
The Bottom Line
The safest way to remove tire marks from a driveway is to identify the surface, test a compatible cleaner, keep it wet for 5-15 minutes, scrub with nylon, and rinse under controlled pressure. Start gently, repeat once when the mark is improving, and stop when the surface finish changes. For asphalt, sealed concrete, old shadows, and damaged coatings, material compatibility matters more than maximum cleaning power. Prevent future marks by reducing stationary tire turns, allowing hot tires and new sealers to cool or cure, and choosing a sealer rated for hot-tire pickup.